
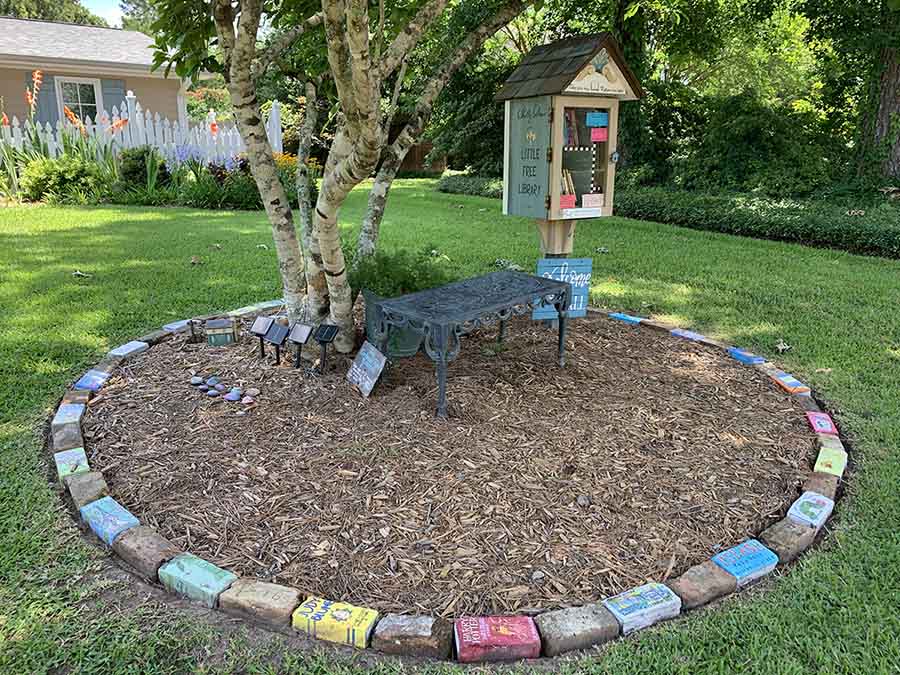
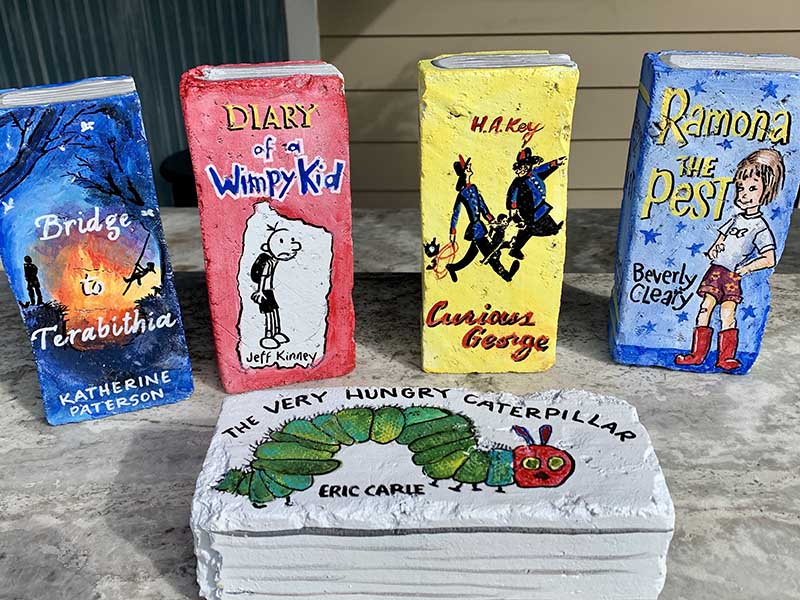
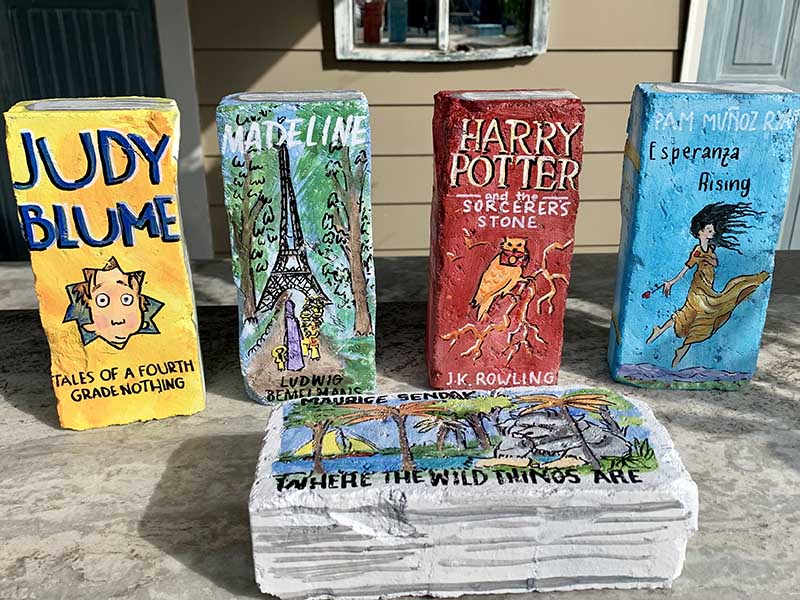
Here’s a fun bookish craft: make book bricks to decorate your Little Free Library or garden! Steward Julie B. in Lafayette, Louisiana, is a calligrapher and artist. She started the Shelly Drive Little Free Library #38509 several years ago as a joint venture with her neighbors. (Find her library and many more on our world map!)
Julie enjoys adding artistic touches to her little library and recently saw photos of books painted like bricks. She set out to recreate them and wrote up a step-by-step tutorial showing how you can do it, too!
Step 1: Begin with bricks that are clean and thoroughly dry. If your bricks are used, scrub them with vinegar and water to clean them. If there are stubborn mineral deposits, try using a wire wheel disk attached to a drill to remove them.
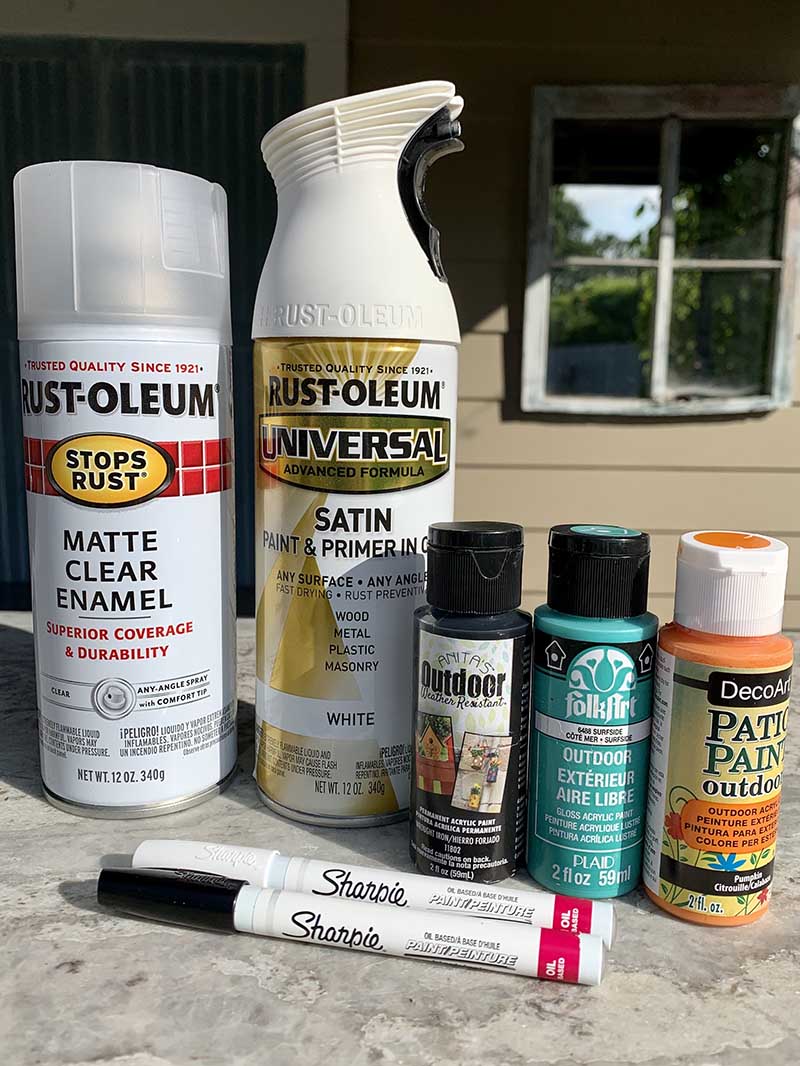
Step 2: If your bricks will be placed outdoors, you must use exterior paint products. For inside use (e.g. bookends) interior or exterior paint is fine.
The bricks must be primed and painted with either spray paint or standard brush-on paint, such as an exterior house paint. Julie used a few coats of Rustoleum all-in-one paint/primer in white with a satin finish. She doesn’t recommend using gloss finish, as the art work layer could slip and be more difficult to cover. White works well since it’s the color of the pages and a good base for the other colors.
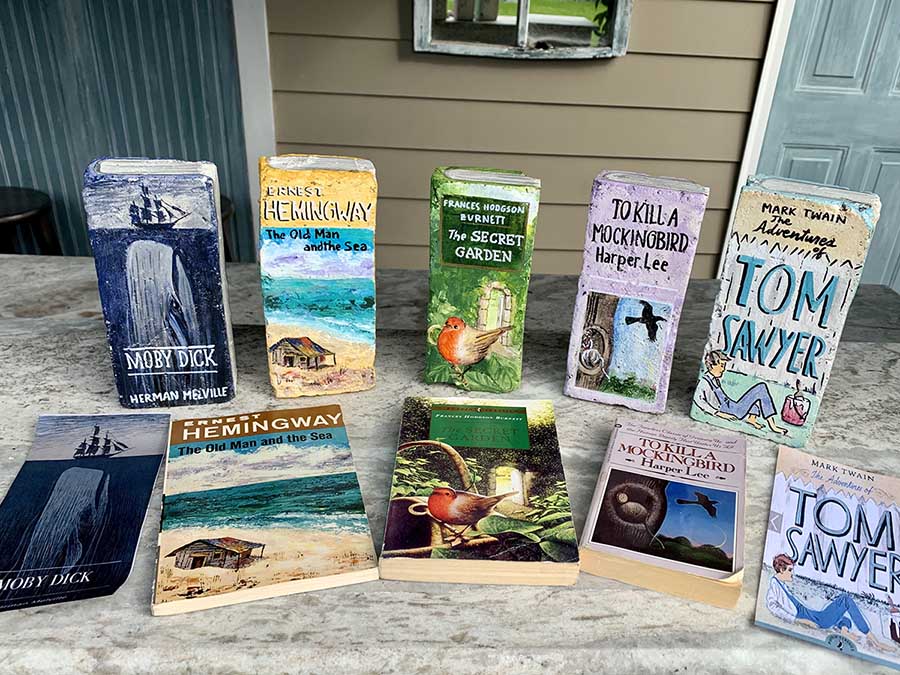
Step 3: You must alter the size and scale of the book covers to fit the tall and narrow bricks. There are a few ways to do this. You could find an image of each book cover you plan to recreate, either from the internet or your own photos of your favorite books. Then you could resize each book cover image using graphic design software and print out the resized images.
Another option is to photocopy an actual book cover (adjusting the size as needed) and use the photocopy as your guide. Or, you could just freehand sketch the cover! You will quickly see that it does not have to be perfect to be recognizable.
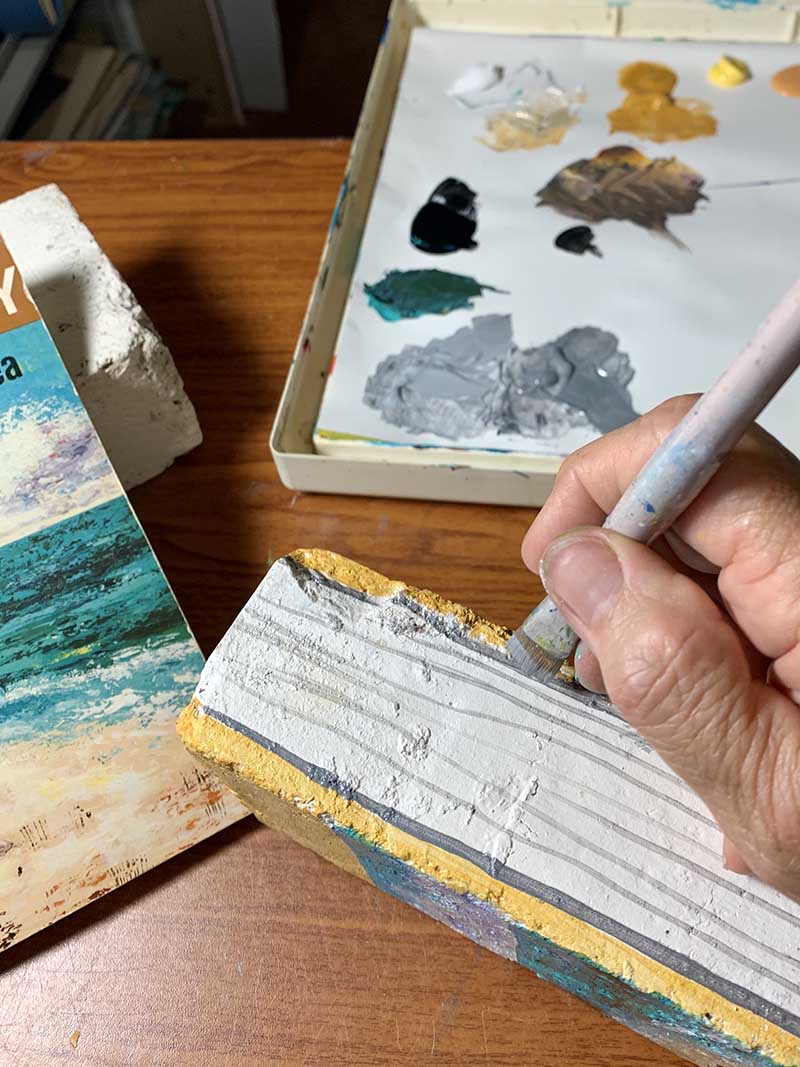
Step 4: Now that you have a resized book cover as your guide, trace the design on the brick! Use carbon tracing paper sold in art supply stores. The brick has texture so the tracing is just a hint at where the elements go. You may prefer to just draw in pencil.
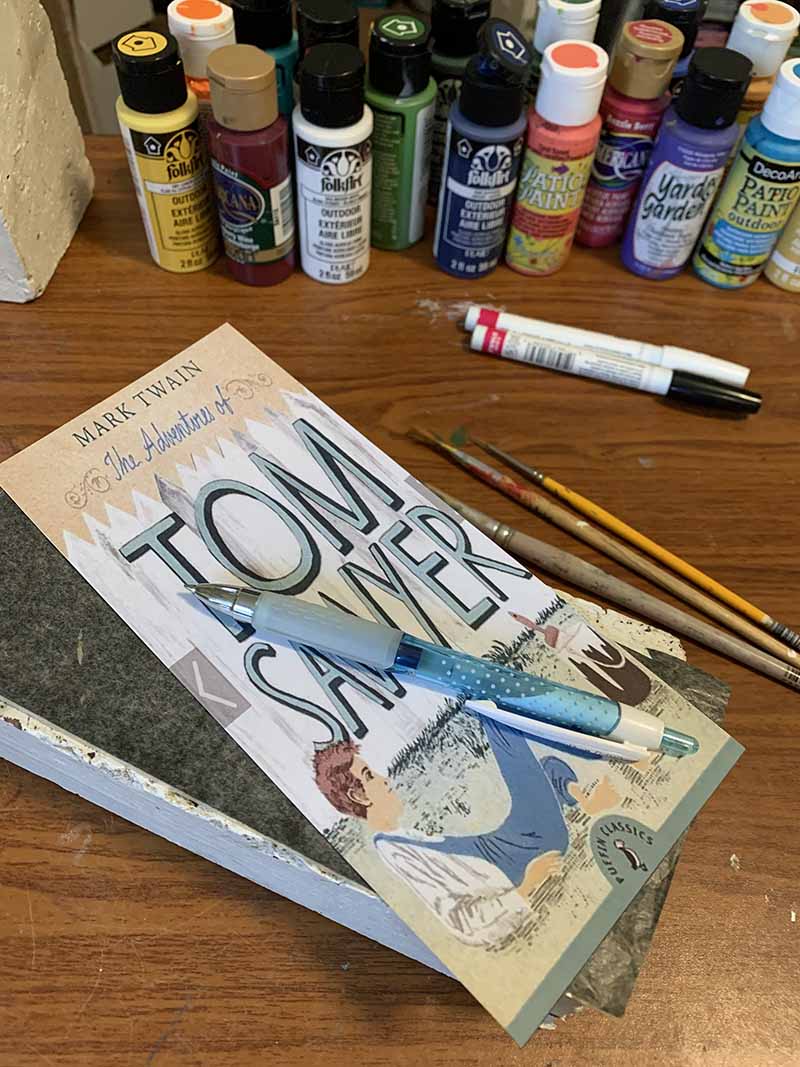
Step 5: Paint the design you just sketched on the brick! Julie used 2 oz. bottles of outdoor acrylic craft paint, available in craft stores. You can quickly cover large areas using a “wash” of a color that is slightly thinned with water. Other areas will need the full-strength paint to cover well. If you are not satisfied with an element you just painted, remove it right away with a q-tip or let it dry and paint over it.
Julie did a very quick design on the sides of the brick. One long-edge became the spine and she painted the other sides to look like pages. Let your design dry several hours before moving on to the next step.
Step 6: Julie kept the painting process quick and didn’t worry about being super detailed. For lettering or fine details, she recommends Sharpie oil-based pens in extra fine and fine size. Let the paint pen dry several hours to cure.
Step 7: For the last step, Julie applied several light coats of Rustoleum Clear Seal in a matte finish to protect the acryclic paint designs. Take care not to apply a heavy coat of sealer, which could drip and cause the paint pen to blur.
Looking for more Little Free Library activity ideas? Julie also wrote up a tutorial on how to create a sandwich sign for your little library! Wondering what books to feature on your bricks? Check out our Read in Color Recommended Reading list for some inspired and inclusive book ideas!