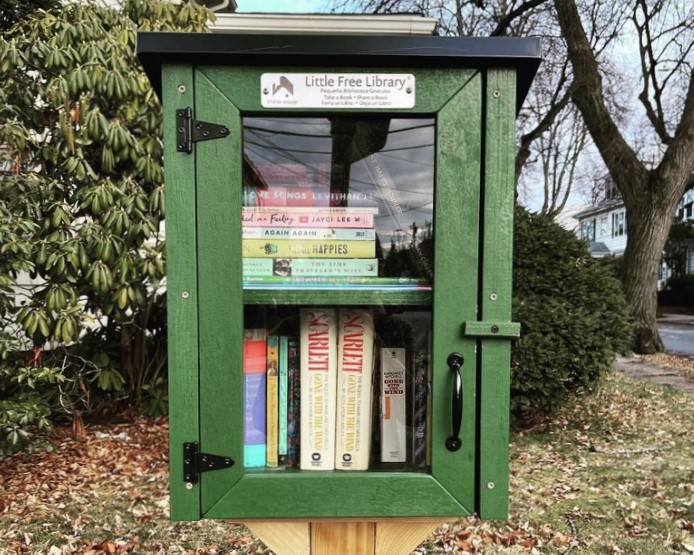
Learn how to build a Little Free Library Kit. These step-by-step instructions show you how to assemble our popular Two Story Shed Little Free Library Kit. We will break down the materials and hardware included with the kit, plus walk through each assembly step. The only tool you need to have is a drill. Let’s build a Little Free Library!
All of our Library Kits can be assembled in under an hour—no woodworking expertise is needed! They make great projects for families or groups. Shop Little Free Library Kits: https://lflib.org/kits
Tools Needed For Assembly
- Drill
Materials Provided
Charter Sign: This makes you an official steward! Your charter sign has your library’s unique charter number and is your key to registering your library on the world map. This is in an envelope on the outside of your library shipping box.
Library
- (A) Front door
- (B) Two side panels
- (C) Base (13 ⅜“ x 11 ¾“)
- (D) Shelf (Slightly smaller than the base with a finished edge)
- (E) Back (18” x 15 ¾“)
- (F) Roof (metal cap + wood interior)
Trim
- (G) Two rear corner pieces
- (H) Two side pieces
- (I) One back piece
Hardware (J)
- Three drill bits: square #2, ¼” hexagonal, and Phillips
- 3” square #2 screws
- 1.75” square #2 screws
- Four – 1” ¼ Hexagonal screws
- 1” square #2 screws
- Four shelf brackets
- Door handle
- Two black-headed square
- 2 door handle screws
- Two .5” Phillips screws (for charter sign)
- Wood glue
Note on drill bits: Pictured from left to right are the square #2, ¼” hexagonal, and Phillips drill bits. You will use the square #2 bit for most of the library. The hex bit is for the roof, and the Phillips is for the charter sign.
Note on glue: Using the provided wood glue will vastly increase the longevity of your Little Free Library. When instructed to use glue, apply a thin line along the entire piece of wood you’re working with. If too much glue is used, wipe the excess away with a damp rag.
Note on finishing your library: If you purchased an unfinished library, we strongly recommend painting or staining both the inside and the outside of the library before installing it outdoors. It may be easier to paint or stain your library pieces before kit assembly.
Two-Story Kit Assembly
- Attach the side panels (B) to the base (C) by adding glue to the short edge of the base and pressing it flush against the bottom edge of the side panel. Make sure the shelf bracket holes on each side panel are facing inwards, towards the base. Attach B and C using the 1 ¾” screws, #2 square drill bit, and predrilled holes on the bottom of the side panel. Repeat on the other side.
- Attach the door (A): Rotate the library the long edges of the side panels (B) are facing upwards. Apply glue to the front edges of each side panel (B) and place the door (A) on top so the bottom is flush with the base (C) and the side panels (B) are flush against the inside of the door trim. Attach using the 3” screws, #2 square drill bit, and predrilled holes on the door.
- Attach the back panel (E) to the side panels (B) and base (C): Rotate the library so the door (A) is face down. Apply glue along the back of the side panels and base, and place the back panel (E) on top so that the bottom edge is flush with the base (it may be exactly flush at the top). Attach the back panel using the 1 ¾” screws, #2 square drill bit, and predrilled holes on the back panel.
- Attach the roof (F): Rotate the library upright and apply glue along the top of the side panels (B). Position the roof (F) on top of the library so the molding on the inside rests on the interior of the back panel (E). Attach the roof (F) to the library using the drill with ¼” hex drill bit, and four 1” screws through the pre-drilled holes on the roof.
- Attach the trim: Position each rear corner trim piece (G) on each rear library corner with the top of angled trim piece pointing to the roof of the library. Attach (G) using the drill, 1” square #2 screws and the predrilled holes on the trim. Repeat this on the other side, with trim pieces (H) so they lie on the bottom exterior of each side panel (B), and with back trim piece (I) along the bottom exterior of back panel (E) using the same method.
- Attach the door handle with your drill, #2 square bit, and black-tipped screws. We recommend the bottom of the handle should be about 3” up from the bottom of the door.
- Insert the adjustable shelf using the shelf brackets and holes on the interior of the side panels (B), insert your shelf (D) through the door and set it at a desired level and the finished edged facing outwards.
- Attach your Charter Sign: Do this at top of the door using the two ½” screws and a phillips drill bit or screwdriver.
- You’re done! Once installed, download the Little Free Library Mobile App and set up an account (using the email you purchased your library with) to push your library live on the world map!
Learn more about starting a Little Free Library and find more library plans and blueprints on our Build page.


Little Free Library has a long history of building book-sharing boxes, and we are glad to share what we’ve learned with you.

